


Best Luxury Niche Perfume Brands for a Signature Scent in 2026
From Maison Francis Kurkdjian to Le Labo and Byredo, these
Authentic Products Only • Fast Delivery Across Ghana

Traditional box braids can be incredibly painful. We have all experienced that intense, heavy tug at the scalp that prevents you from sleeping comfortably for the first three nights after leaving the salon chair.
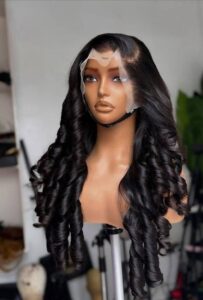
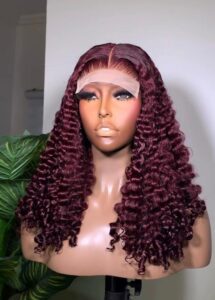
That discomfort explains why knotless braids are so popular. By starting the braid with your own natural hair and gradually feeding in synthetic extensions, you completely remove the heavy knot at the root. The final look is flat, lightweight, and painless.
If you are trying to master knotless braids on your own head or a friend’s, forget the overly complex videos that make it look like magic. It is just muscle memory and rhythm.
Let’s look at the actual step-by-step process, the specific products required, and the mistakes to watch out for.
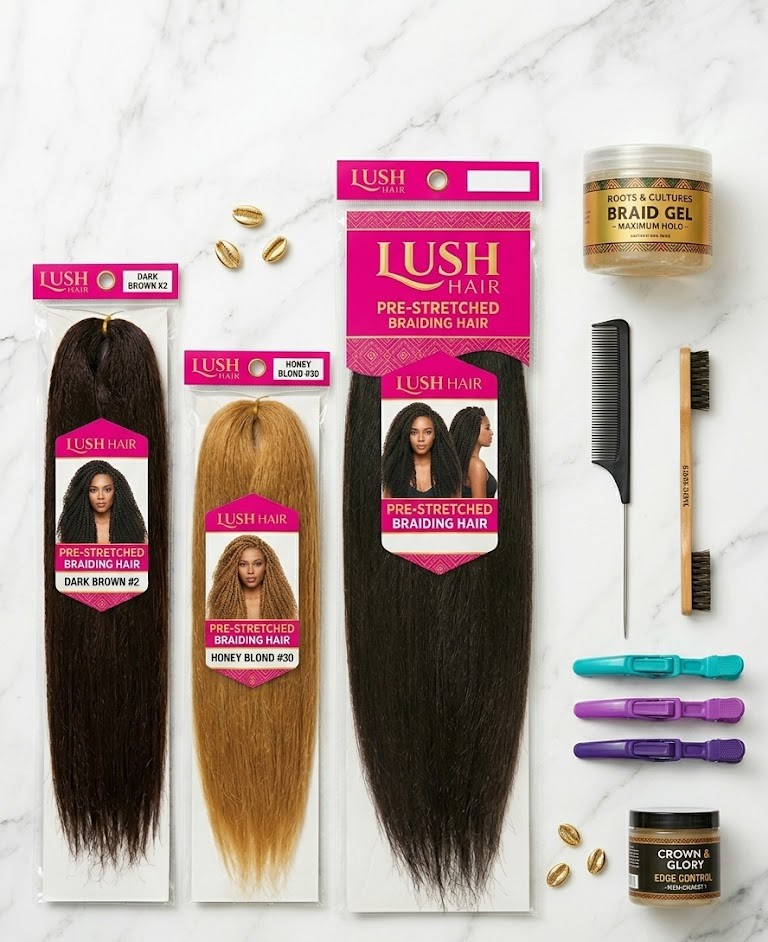
Do not try to wing this process with whatever products are left in your bathroom cabinet. Having the right supplies directly impacts how neat your final knotless braids turn out.
Clean, straight hair makes installing knotless braids significantly faster. Wash, deep condition, and blow-dry your natural hair completely straight to remove any tangles. Divide your hair into four large quadrants using hair clips to keep things organised.
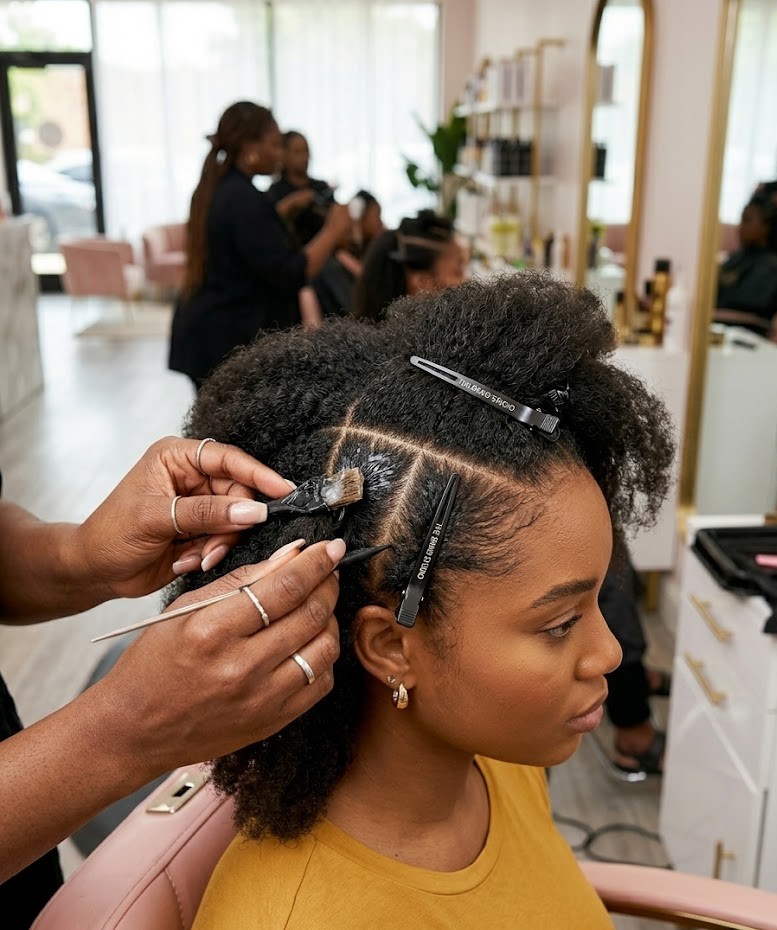
Within your first quadrant, use the metal tip of your rattail comb to map out a small, square box section.
Apply a generous dab of your braiding gel directly onto the roots of this section. Comb the product through from root to tip; this flattens the hair, catches flyaways, and creates a crisp foundation.
This step keeps the style completely flat and painless. Divide your small section of natural hair into three equal strands: left, middle, and right.
Begin a standard three-strand braid by crossing the right strand over the middle, and then the left strand over the new middle strand. Repeat this for two to three full passes. Building this extension-free anchor on your natural hair keeps all the tension off your scalp.
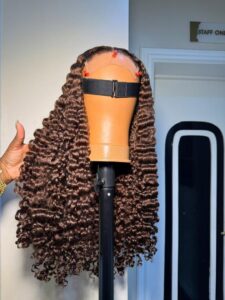
Before you begin, separate your pre-stretched synthetic hair into small, thin strands. Take one thin strand and fold it into a U-shape loop.
As you prepare to make your next braid pass, place the loop between your thumb and index finger right at the base of your natural braid.
Blend one side of the synthetic loop with the natural hair strand currently in your left hand, and combine the other side of the loop with the strand in your middle hand. Continue your standard braid rotation to lock the extension hair into place.
To prevent your knotless braids from looking bumpy or misshapen, add thickness very gradually. Perform one or two standard braid passes with your first addition, then feed in a second thin strand of extension hair using the exact same loop technique.
Repeat this a third and fourth time as you work your way down. Constantly feel the three strands in your hands to ensure they remain equal in thickness. Apply tiny tabs of your braiding gel down your natural hair to blend any stray hairs directly into the synthetic fibres.
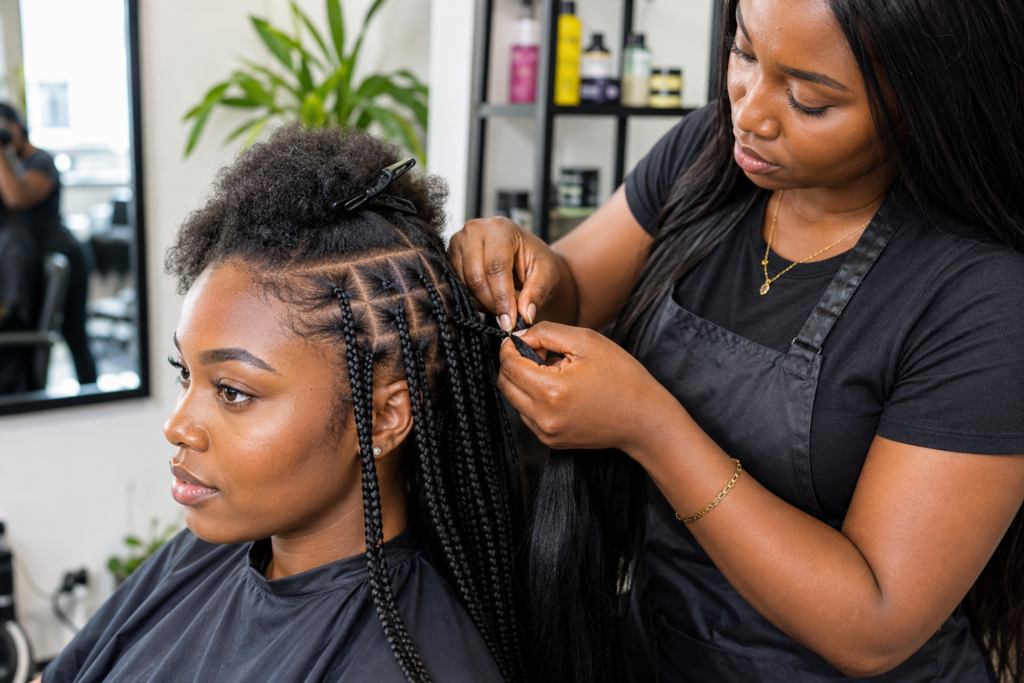
Once all your extension hair is added, continue braiding consistently downward until you reach the very tips of the synthetic hair.
To seal the ends and prevent unravelling, carefully submerge the braided tips into a thermos of boiling hot water for a few seconds. Blot the wet ends immediately with a dry towel.
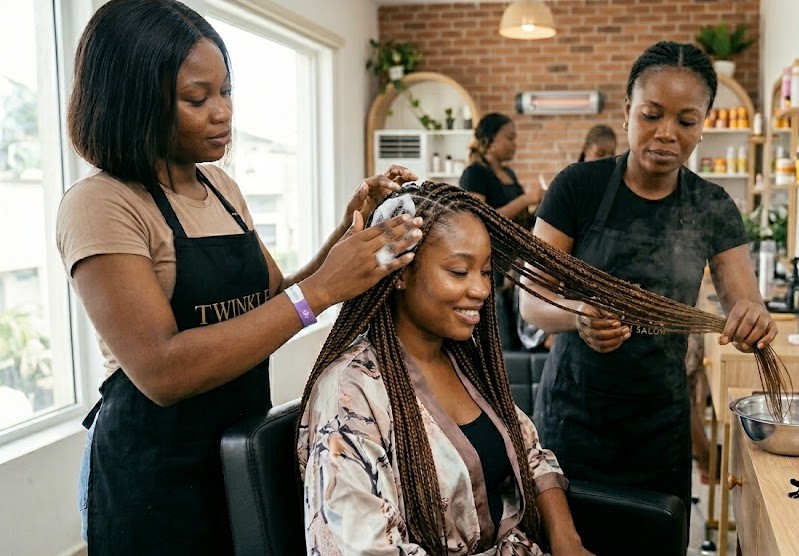
Apply a generous layer of wrap-setting mousse across your scalp and the length of the braids, then tie your roots down with a silk scarf for 15 minutes to set the style completely flat.
Don’t get discouraged if your first few attempts look a little loose or take you an hour per braid.
Start by practising on the back of your head, where mistakes are hidden, or use a mannequin head until your fingers get used to the rhythm of feeding in the hair.
Take your time, keep your parts clean, and remember that neatness comes with practice. And if you’d like a flawless, professional install insread, book an appointment with Twinkles Beauty if you’re in Accra.
Based on the most common actual search queries online, here is what you need to know:
For a beginner, installing a full head of medium knotless braids typically takes anywhere from 5 to 8 hours. Because you are manually threading in individual strands of hair for each braid, it takes longer than traditional box braids. The total time heavily depends on the size of the parts and the desired length of the extensions.
With proper care, a set of knotless braids usually lasts between 6 and 8 weeks. Because the base starts with your natural hair, your new growth will show a bit sooner than it would with traditional knotted box braids.
Yes, you can absolutely wash them, but focus your energy on cleansing your scalp rather than aggressively scrubbing the braids’ lengths. It is highly recommended to use a diluted shampoo mixture in an applicator bottle to clean your parts without causing premature frizz.
No. In fact, they are highly regarded as an excellent protective style. Because the hair extensions are fed in gradually down the strand, the weight is distributed evenly, which prevents scalp tension, pulling, and hairline breakage.
From Maison Francis Kurkdjian to Le Labo and Byredo, these
You’ve probably noticed that a lot of people wear the
Butterfly braids have quickly become one of the most stylish
Get exclusive beauty tips, product launches, and special offers directly to your inbox.

Twinkles Beauty is your trusted destination for premium skincare, haircare, makeup, and beauty essentials tailored for the modern African woman.
© 2026 Twinkles Beauty. All rights reserved
Terms & Conditions
We use cookies to improve your experience on our site. By using our site, you consent to cookies.
Manage your cookie preferences below:
Essential cookies enable basic functions and are necessary for the proper function of the website.
These cookies are needed for adding comments on this website.
Statistics cookies collect information anonymously. This information helps us understand how visitors use our website.
SourceBuster is used by WooCommerce for order attribution based on user source.